Community Sampler Week #6
Welcome to week #6 of the Community Sampler sew along where we not only work on our patchwork piecing techniques but also share our makes on Instagram and have fun with a like-minded community of quilters. My co-host and sister Art Gallery Fabrics designer Maureen Cracknell and I are so happy to have you sewing with us and look forward to spending the next few months with you.
There are eleven blocks in our quilt and each Wednesday will be a new PDF block release or finishing step for the quilt. If you are just joining us, pick up the Introduction PDF on the Sew Along page and you'll get a material list along with coloring pages so you can get started planning your quilt. Then, work your way through the first Community Sampler post to the present.
Many of the patchwork units (like Quick-Corner, Flying Geese, Half-Square Triangle, and Square-in-Square units) used in this year's sampler have already been oversized to allow for trimming and squaring of units before assembling your block. Please cut your pieces EXACTLY as given in each of the PDF instructions because bumping up the size of the pieces from the measurements give will not bring great results in some cases. Take advantage of my in-blog tutorials for each of the different quilting techniques used in our sampler.
Accurate cutting and use of a true 1/4'' seam allowance is a must for successful patchwork piecing. All your blocks will measure 12-1/2'' square (unfinished). Review how to cut strips, sew with a true 1/4'' seam allowance, and other helpful piecing tips on my "Are You Ready to Sew" post.
Let's start sewing the Fairground block. Download the free PDF on the Sew Along page.
Square-in-Square Unit Tutorial
Use the following link for review how to make Half-Square Triangle (HST) units and No-Waste Flying Geese units that we've already used in earlier Community Sampler blocks. There's a lot of moving pieces in the Fairground block and accuracy is always our goal. The more seams in a block the more even minor discrepancies will start to multiply into a big mess. Make sure all pieces are true to size as you work and you maintain an accurate 1/4" seam allowance when sewing and the pieces will go together beautifully.
If you're wanting to use directional prints for either the HST units or the Flying Geese units you may want to check out my tutorial for controlling directional prints that was posted during the Sewcial Bee Sampler sew along.
To see how this Square-in-Square unit is created in a video, view the Bloc_Loc method for making this units in the Flying Geese rulers tutorial or follow along with my step out tutorial below.
Cut the two 3-1/4” in half diagonally to make four HST pieces
Fold the 3-3/8” fabric D square in half and press to crease.
Stack two fabric A HST pieces with edges matched. Center and align the point of the stacked triangles with the vertical crease line and straight edge matching the edge of the square.
Trim dog ears of stacked triangles with edges of the square.
Rotate the square 90° so crease line is now parallel with top edge of square. Place a trimmed triangle right sides together and edges matched to top edge of square. Stitch with a 1/4” seam allowance.
Press corner out. Repeat for the opposite side.
Rotate the pieced section 90° and use the vertical crease line to center an untrimmed triangle. Stitch to section, noting how the stitch line enters and exits at the “V” where the two fabrics intersect. Press corner out. Repeat on the remaining side to make a Square-in-Square unit.
Trim unit to 4-1/2” square, leaving a 1/4” seam allowance on each side. If using the Bloc_Loc 2” x 4” Flying Geese ruler to trim your Square-in-Square unit, trim one side at a time, rotating your unit 90° between each trim. Watch the Bloc_Loc tutorial for piecing and trimming of a Square-in-Square unit.
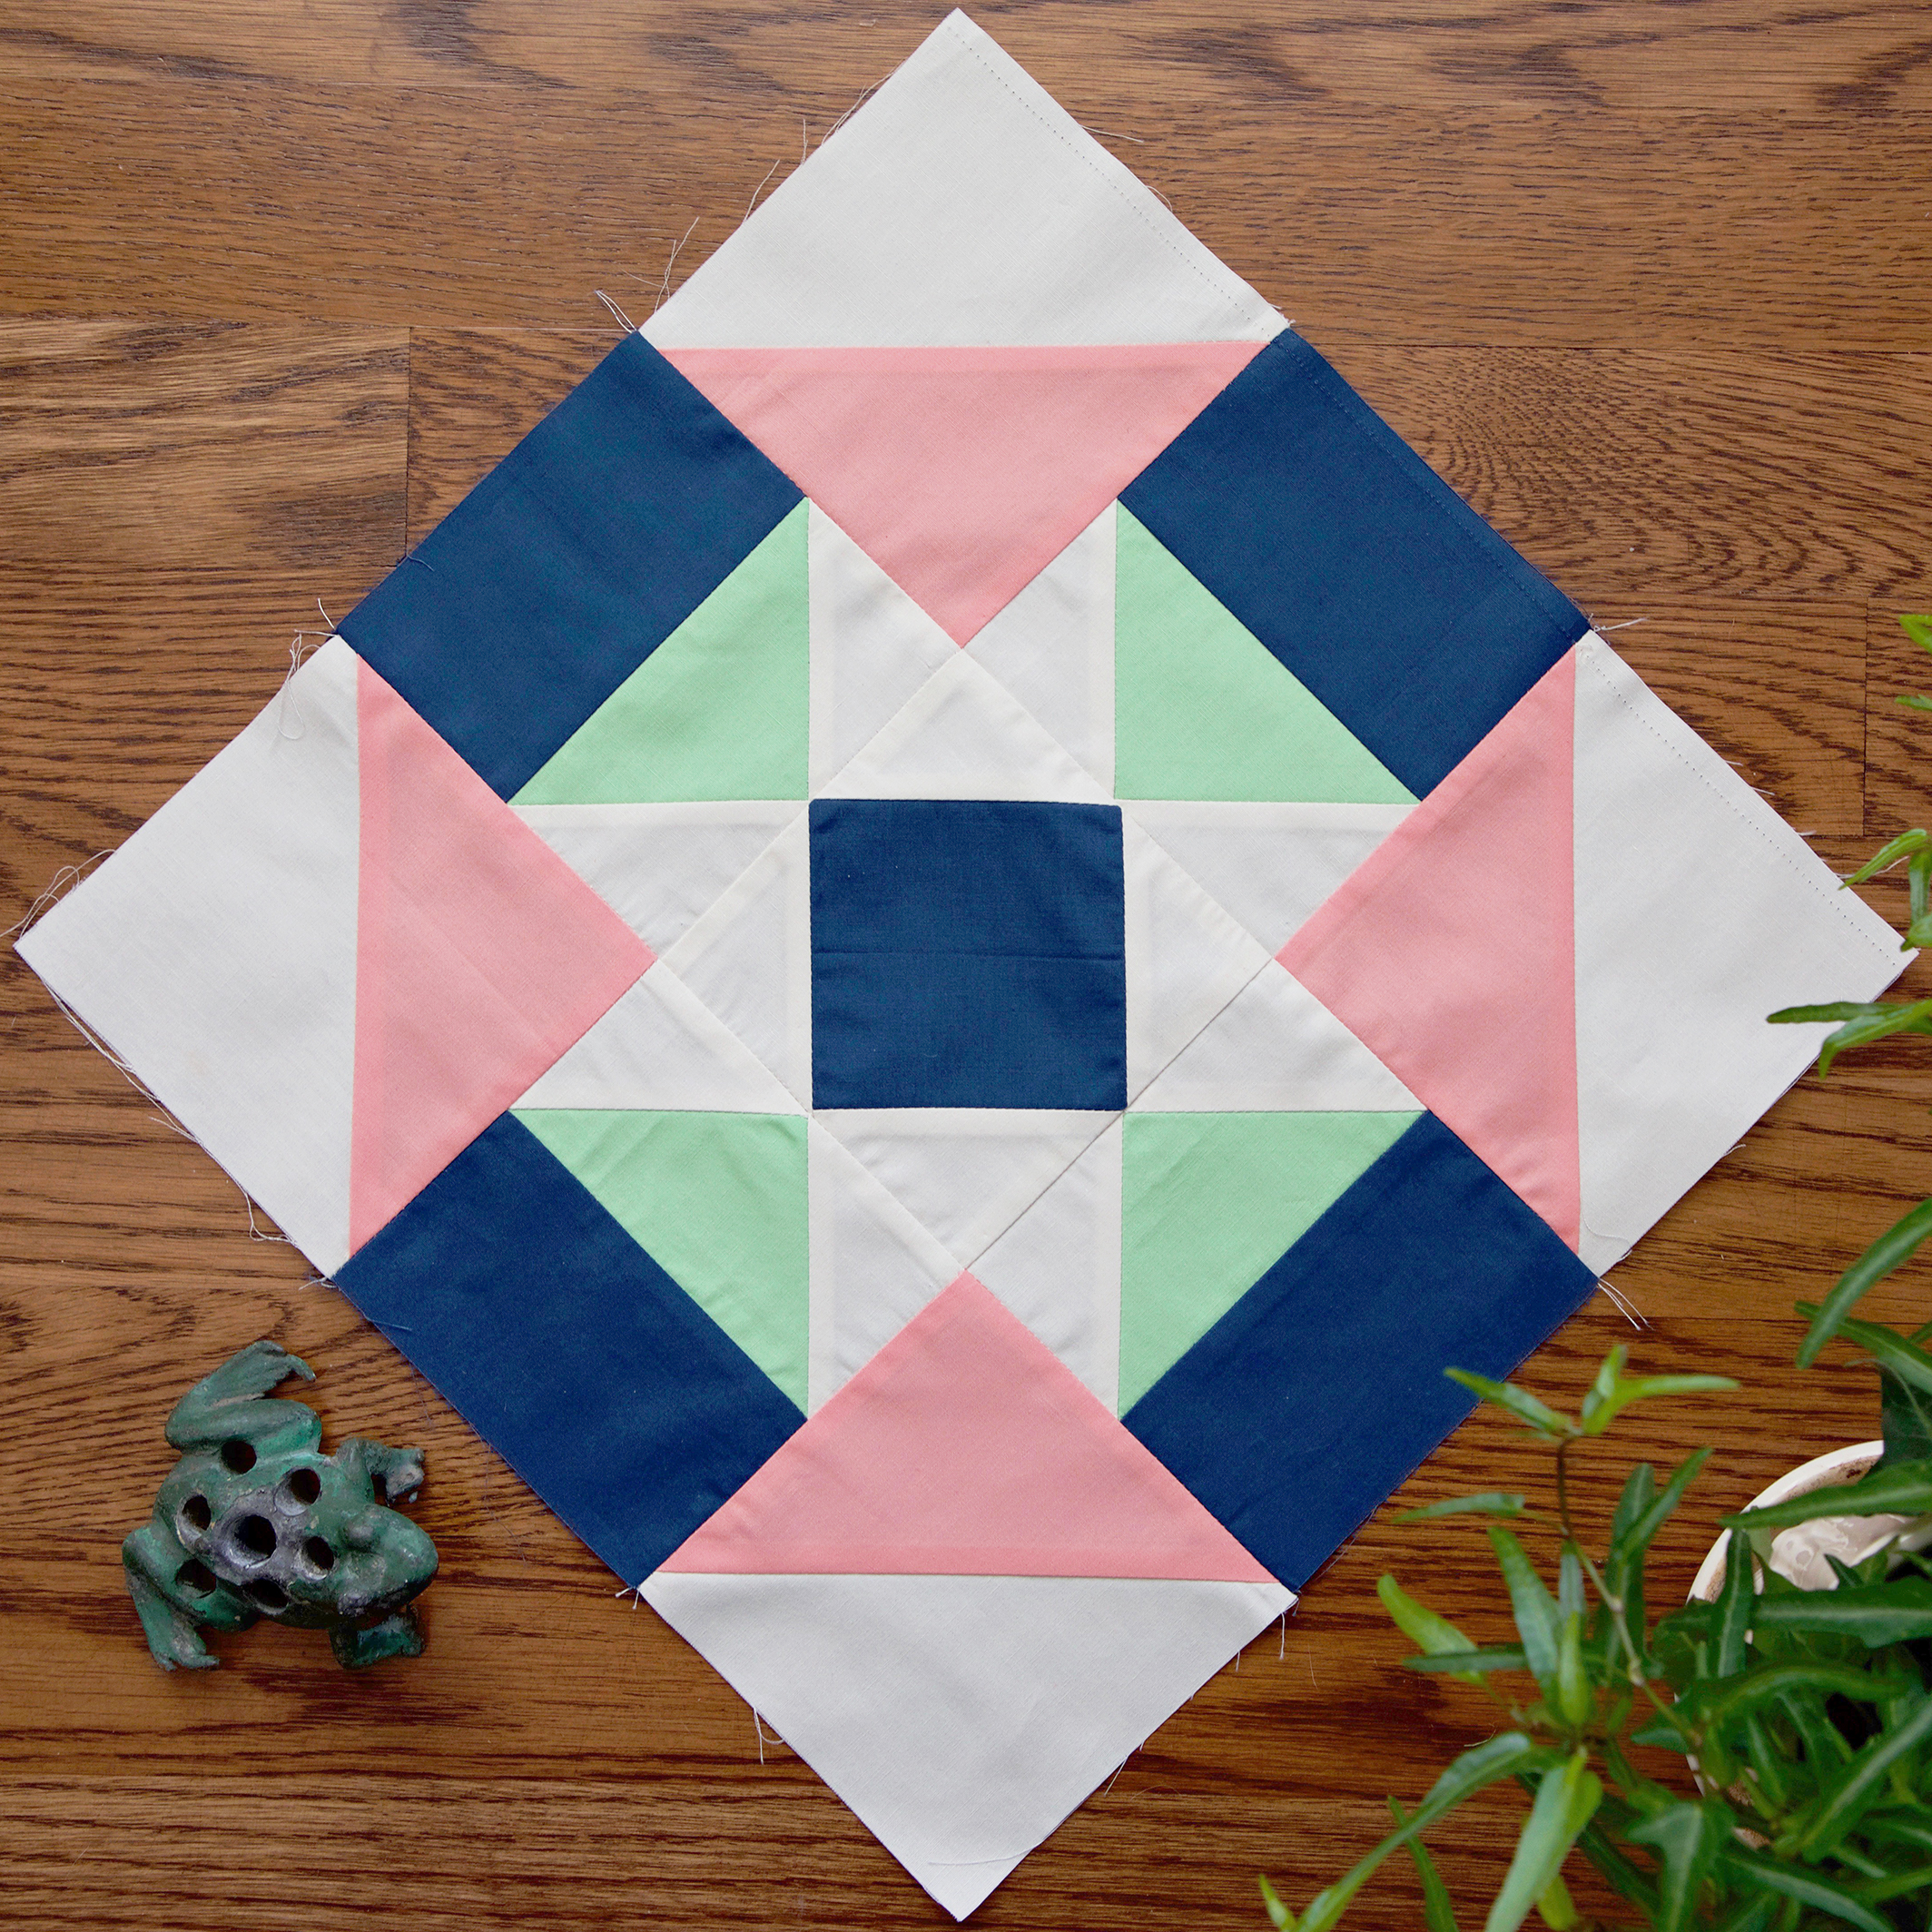
I pieced my Fairground block with a slight variation from the instructions. Instead of cutting four 2-1/2” x 4-1/2” rectangles from fabric A, I cut those four rectangles from my blue fabric D. This gave the block more visual weight on the edges and created an octagon shape within the block.
For my sampler I'm sewing with Art Gallery Fabrics Pure Element solids. I've been getting a lot of questions as to the exact colors I'm sewing with so I will start including a swatch image each week showing the sku number of each solid. Clockwise from the peach is Grapefruit, Creme de la Creme, Night Sea, and Pistachio Creme.
My completed block! I like it's playfulness and all the second and maybe third designs these patchwork shapes make. Have fun with your block and don't be afraid to add more or even less different fabrics into it to make it your own.
If you notice I had to pull out the seam ripper to correct sewing that top row upside down--oops. This stuff happens and I don't care how seasoned a quilter you are--that's why seam rippers were invented!
Community Sampler Sponsors
Lady Belle Fabric Omnigrid Aurifil Thread Art Gallery Fabrics
Hobbs Batting Dritz Fat Quarter Shop Bloc-Loc
My co-host Maureen Cracknell and I are continually amazed by the joy and excitement each of you bring to our virtual community. Thank you for making this sew along so special. Please visit Maureen's blog and see the progress she's making on her sampler quilt, using her beautiful AGF fabrics Love Story collection. Be sure to use the #CommunitySampler hashtag when posting your blocks to Instagram and tag both my @sharonhollanddesigns and @maureencracknell so we don't miss any of your beautiful work!
Don't forget that this Friday's a Giveaway Friday on the Community Sampler sew along. Maureen and I will take turns hosting a giveaway each week where one of our generous sponsors will be featured and offering amazing prizes both here on our blogs and also on Instagram. I will be hosting the giveaway this Friday and you'll be instructed how to enter at that time.
Happy sewing!


